Beyond Light Destiny Exodus Crash Grandmaster Guide

Beyond Light Destiny Exodus Crash Grandmaster Guide
By | January 12th, 2021 | Categories: Destiny

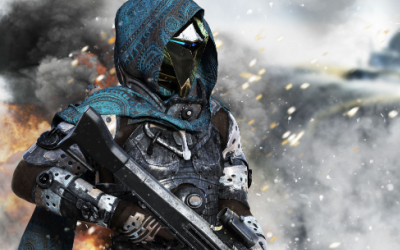
Exodus Crash has been one of the most discussed missions. Dropping right at the end of last year, this Grandmaster Nightfall has been known for its high difficulty level. Exodus Crash is a Nightfall (Strike) where your objective is to track down and destroy the Fallen on the gigantic wreckage of the Exodus Black ship on Nessus. In this Destiny Exodus Crash guide, we’ll be taking you through everything you need to know about the Exodus Crash Grandmaster Nightfall – right from the best loadout, strategies, how each level and encounter works, and the best strategies to finish the Nightfall efficiently. First, let us take a look at the ideal loadouts, along with the team composition and gear optimization.

How to optimize your Warlocks and Titans

The Warlocks need Phoenix Protocol, one of the best mechanics in the game that lets you recharge your Super when you get kills standing in the Well of Radiance. Surge Eater and Thermal Overload are also very useful on your Warlocks during this mission, since your grenade-stun will be helpful in many situations.

For this mission, having a Titan on your team is also important, the reason being that you’ll also be using the Ursa Furiosa Exotic Gauntlets. If you stand outside the Well and are using your Shield, taking damage will recharge your Super bar. This, combined with all the Orb pickups from your teammates’ kills, will be super helpful in this mission. Also when you use these Gauntlets to block damage, you also get a damage buff yourself.

Along with this, you need a Void piece with Charge Harvester and one with Protective Light. Charge Harvester charges you up with Light whenever you get kills. This also works on getting assist kills. The Gauntlets you use on your Titan have an important mechanic, as the recharge is directly proportional to the damage you take, and having your Super attack back as soon as possible is always a good thing. You also need Radiant Light in your loadout, as you can generate Charge with Light whenever you charge your Super. Also put Global Reach on one of your armor.

First encounter- the starter Area and Overload Champion

The first area is pretty straightforward, and the number of enemies you encounter won’t be overwhelming at all. The enemies will also be at a distance from you, letting you get kills easily using your Scout or Auto Rifle. Make sure you have Overload Scout on your rifle before the mission.

This area also has a lot of natural cover, which helps quite a bit when you’re clearing enemies. Finally, you’ll encounter the champion that doesn’t have any surprise mechanics – just the regular Overload Champion self-healing. The key is to consistently deal damage as a team, take cover, and have proper communication. Once you’ve eliminated them, you can move to the next area.

Second encounter- Protecting the Ghost

The next are has more enemies, along with another Overload Champion. Stun them, do consistent damage, and keep going. You also don’t need to waste your Supers for these encounters, since you’ll be able to take them down without any issues.

Following this, you will enter the area where you need to protect the Ghost. This is a circular zone with the Ghost in the middle. Prioritize killing the smaller enemies first, then go for the two Overload Champions. The Champions will spawn away from the Ghost and there is plenty of potential for natural cover, so don’t worry about it at all.

You’ll also have to go through a bunch of Servitors and a Barrier Champion (has a bubble around it and self-heals) – that you can take down using Anti-Barrier Rounds. This will be followed by another Overload Champion. Make the most of your Well of Radiance and Ursa Furiosa here, and you won’t have any issues at all.

At the end of this encounter, you will come across a Heavy Shank. It will have a Solar Shield that you can take down using the Solar Grenades using the Warlock.

Third encounter- Destroying the Tank

Following this, you have to go through some Arc Pulses and destroy a giant Tank. The best way to go about this is to target its legs first from a distance, using your Auto or Scout Rifle. Speaking of Scout Rifles, have you noticed how they’ve quicky become the meta in harder content?

An important thing to note here is that you team should ideally be close by, in case someone needs to be revived. In the area, there is a long tower fallen uphill behind which you can safely sit and shoot with the rest of your teammates.

There will be ads spawning around the Tank, and it won’t take more than two minutes to go through this if your team is well-coordinated. Following this, you will proceed further to encounter more ads along with an Overload Champion. Watch out for the snipers in this area, and make sure everyone has their abilities and Supers recharged before heading to the final encounter.

Final encounter- the Boss

Before you encounter the Boss, you will have to clear out the Shanks in the room. Once the Boss spawns, you will need a coordinated effort to take it down because it is so agile and deals so much damage.

Your Ursa will be very helpful here to block the incoming damage. Timing your Supers and Well of Radiance is key here, because the Boss will disappear every now and then, and it’s a waste if you set off your Super right before it’s about to teleport.

To make things harder, right when you’re about to finish the boss, two Barrier Champions will spawn in that you will need to defeat. Keep your distance, leverage Anti-Barrier, and finish them off before finally finishing the boss.

Destiny Exodus Crash Guide Endnote

This is one of the hardest Nightfalls in the game, and a Grandmaster really needs you to Masterwork your gear and plan accordingly. We hope our Destiny Exodus Crash guide helped you understand this Nightfall and its requirements better. Good luck with the Grandmaster!

If you liked this, you should also check out our Destiny Deep Stone Crypt Raid Guide for Eyes of Tomorrow.

Leave A Comment

Latest posts

Latest Wiki

Featured Posts